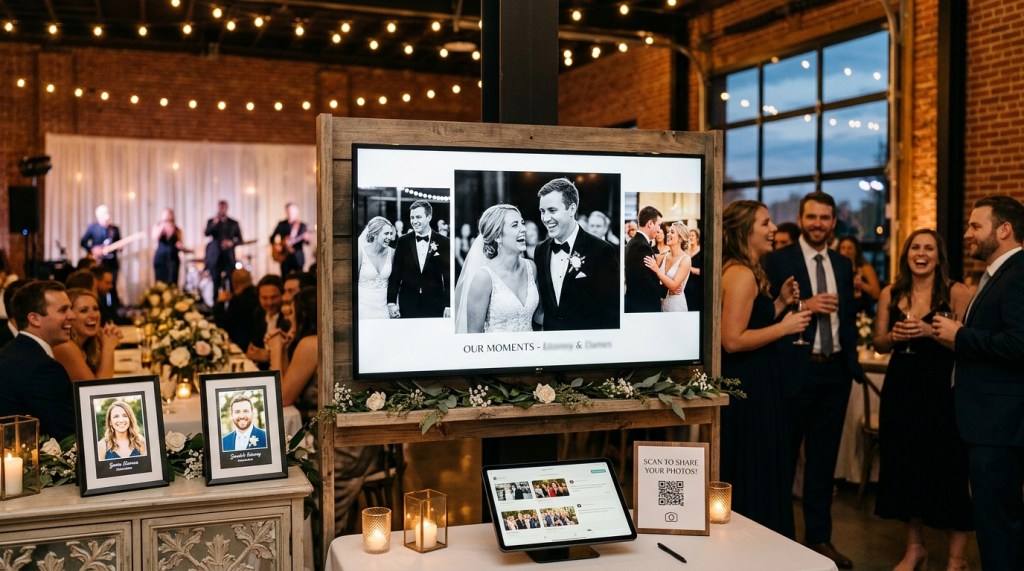
Weddings are full of moments worth remembering, from the ceremony and first dance to candid photos shared by friends and family. Instead of keeping all those memories on individual phones, couples can display photos electronically at a wedding and make them part of the celebration.
A digital display can turn a TV, projector, LED screen, or other large display into a shared photo experience. Guests can see wedding moments as they happen, while photos taken during the celebration can be collected and shown throughout the event.
Whether you’re planning an intimate reception or a large wedding, there are several simple ways to display wedding photos electronically. This guide covers the different options, how they work, and what to consider when choosing one.
Why Display Photos Electronically at a Wedding?
A wedding photo display isn’t just another decoration. It can help bring guests into the experience and create a visual collection of moments throughout the day.
Here are some reasons couples choose a digital display.

Share Photos With Everyone
Guests often take hundreds of photos during a wedding. However, those photos usually remain on individual phones.
A digital display gives everyone at the venue a chance to see selected moments without needing to send photos to each other.
Keep the Reception Engaging
A screen showing changing photos can add movement and interest to a reception space, especially between major parts of the celebration.
It can also give guests something to look at while they’re eating, talking, or waiting for the next event.
Include Guest Photos
Professional wedding photography captures important moments, but guests often capture spontaneous and candid moments that a photographer may miss.
Displaying approved guest photos can make the experience more personal and inclusive.
Create a Shared Memory
A collection of photos appearing throughout the celebration can become a visual story of the day—from getting ready to the ceremony, reception, and dance floor.
Different Ways to Display Wedding Photos
There isn’t one right way to create a wedding photo display. Your choice will depend on the venue, equipment, number of guests, and how you want photos to be collected.

1. Use a TV Screen
One of the simplest options is to connect a TV to a computer, media player, or compatible photo-sharing system.
You can create a slideshow containing selected wedding photos and let it run during the reception.
This works particularly well for smaller venues where a large projector or LED wall isn’t necessary.
2. Use a Projector
A projector can turn a wall or projection screen into a large photo display.
This option works well in venues with suitable blank walls or dedicated projection screens. You can use a slideshow or live photo feed depending on your setup.
3. Use an LED or Digital Screen
Larger weddings and venues may already have LED screens or digital displays available.
These can be used to display photos at a wedding alongside other wedding visuals, such as names, messages, schedules, or videos.
Because these displays are often visible from across the venue, they’re particularly useful when there are many guests.
4. Create a Social Photo Wall
A social photo wall can collect photos shared by guests and display selected content on a common screen.
For example, guests could post their wedding photos on social media using a specific hashtag. The selected posts can then appear on a screen at the venue. This type of social media display can help bring guest-generated content into the wedding experience without requiring every photo to be manually added to a slideshow.
Some platforms also allow photos to be submitted directly rather than requiring guests to post them publicly.
How to Display Wedding Photos at the Reception
The reception is often the best opportunity to create a live photo display because most guests are together in one place.
If you want to display wedding photos at reception, you can combine photos taken by the couple, photographer, and guests.
A typical setup could look like this:
Guest takes a photo → Photo is submitted or shared → Photo is reviewed → Approved photo appears on screen
This approach lets you create a continuously changing collection without requiring someone to manually update a slideshow every few minutes.
Option 1: Pre-Made Slideshow
You can prepare a slideshow before the wedding using engagement photos, childhood pictures, family photographs, and professional wedding images.
The slideshow can then be played on a TV, projector, or digital screen during the reception.
This is a reliable option because all content is prepared beforehand.
Option 2: Live Guest Photo Feed
A live photo feed allows guests to contribute photos during the wedding.
Depending on the setup, guests may submit photos through a dedicated upload page, QR code, or social media hashtag.
After moderation, the photos can appear on the reception screen.
This creates a more spontaneous experience because the content changes throughout the event.
How to Show Wedding Photos on Screen in Real Time
If you want a more interactive experience, you can use a photo-sharing or social wall platform.
A tool such as Social Walls by Taggbox can be used to collect and curate guest-generated content for a wedding display. Its Wedding Wall approach can bring approved guest photos and social posts together so they can be shown on a screen during the celebration.
The exact setup depends on the venue and the type of content you want guests to submit.
A typical workflow:
- Create a wedding photo feed.
- Choose how guests will submit photos.
- Share the submission link or QR code.
- Guests upload or share their photos.
- Review and moderate the submissions.
- Display approved photos on the wedding screen.
- Let the feed update throughout the event.
This makes it easier to show photos at a wedding without relying entirely on a manually updated slideshow.
How to Get Guests to Share Their Wedding Photos
The biggest challenge with a live photo display is getting guests to contribute content.
Fortunately, the process can be made simple.
Use a QR Code
Place a QR code on:
- Reception tables
- Wedding invitations
- Welcome signs
- Table cards
- Photo booth areas
- Venue screens
Guests can scan the code with their phones and follow the instructions to submit a photo.
Create a Wedding Hashtag
A unique wedding hashtag can help organize social posts related to the celebration.
For example:
#TheSmithWedding2026
Guests can use the hashtag when sharing photos on supported social platforms.
If you’re collecting social posts, remember to moderate the content before showing it publicly.
Add Instructions Near the Screen
A simple message such as:
“Share your favorite wedding moment to see it on the big screen!”
can make the purpose of the display immediately clear.
What Can You Include in an Electronic Wedding Photo Display?
Your display doesn’t have to contain only photographs.
Depending on the platform and setup, you can include:
- Guest photos
- Professional wedding photos
- Engagement pictures
- Short videos
- Social media posts
- Wedding hashtag posts
- Messages from guests
- Candid moments
- Photo booth pictures
Combining different types of content can make the display feel more like a live visual story rather than a traditional slideshow.
How to Create a Digital Wedding Photo Display
A successful digital wedding photo display usually combines good content with a simple technical setup.
Step 1: Choose Your Display
Decide whether you’ll use a TV, projector, LED screen, or video wall.
Step 2: Choose Your Photo Source
Decide whether photos will come from:
- A pre-selected collection
- Guest uploads
- Social media
- A photo booth
- A combination of these sources
Step 3: Decide How Photos Will Be Submitted
For live guest content, consider using a QR code or simple upload link.
Step 4: Set Up Moderation
Decide who will review photos before they appear on the screen.
Step 5: Design the Display
Choose a layout that matches the wedding theme while keeping photos prominent.
Step 6: Test Everything
Test the complete setup before guests arrive. Check the internet connection, screen resolution, photo rotation, and submission process.
Tips for a Better Wedding Photo Display
Keep the Process Simple
Guests shouldn’t have to create an account or complete several complicated steps just to share a photo.
Moderate Guest Content
If photos are being collected from multiple people, review them before putting them on a public screen.
Use High-Quality Photos
Large displays can make low-resolution images look blurry. Encourage guests to submit clear photos whenever possible.
Don’t Change Photos Too Quickly
Give guests enough time to recognize and enjoy each photo.
Keep the Screen Visible
Place the display somewhere guests naturally look, such as near the dance floor, reception area, or entrance.
Test Before the Wedding
A live photo display involves several components. Test everything beforehand so technical issues don’t interrupt the celebration.
Final Thoughts
A digital photo display can turn hundreds of individual wedding memories into a shared experience. Whether you use a simple slideshow on a TV or a live feed on a large event screen, the goal is the same: give guests a way to see and enjoy moments from the celebration as they happen.
For a simple setup, a pre-made slideshow may be enough. If you want guests to contribute photos throughout the event, a live photo feed or wedding social wall can make the experience more dynamic.
The best approach depends on your venue, equipment, number of guests, and how much interaction you want during the celebration.


Leave a Reply